You can download a pdf version of the help page here
Table of Contents
- Introduction
- Prerequisites
- Location Dimension Assignment Setup
- Usage Example – Journal
- Usage Example – Document
- Usage Example – Assembly Order
- Supported Transactions
- FAQs
Introduction
Location Dimension Assignment gives you the ability to assign a dimension value to a Location Card in order to auto set the assigned dimension value to future location-based transactions. This saves you the redundant and error prone process of having to manually assign a dimension value that represents a location even after already having entered the location on the transaction.
Many companies desire to report on revenue and expenses by location and this app assists with automatically setting the dimension values needed to do so. This leads to more accurate and reliable financial reports as well as less time spent on reconciliation and corrections.
Features
- Assign a default dimension value to a location card
- Avoid error prone manual assignment of dimension values
- Improve productivity simplifying data entry
Prerequisites
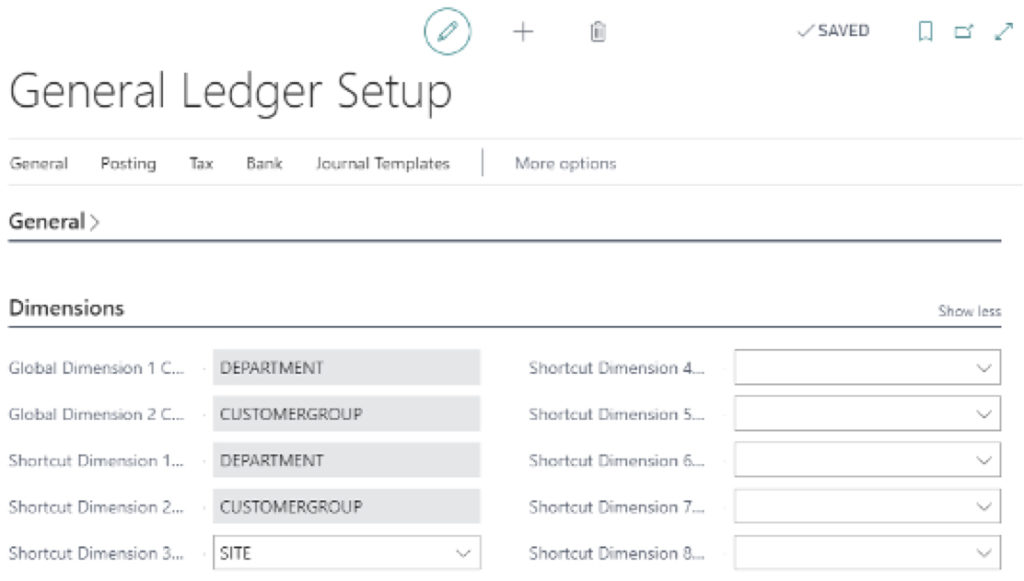
A dimension must be assigned as a Global or Shortcut Dimension in the General Ledger Setup page in order for it to be compatible with the app. Therefore, only the eight dimensions in the General Ledger Setup page are supported for use with the app. This guide will use the Site dimension as an example, and it has been assigned to Shortcut Dimension 3.
Location Dimension Assignment Setup
When the Location Dimension Assignment app is installed, it creates two permission sets. If you are not assigned the SUPER permission set, then you must be assigned the LOCDIMSETUP permission set in order to complete the steps in this section. All other full end users (i.e. licensed as Essential or Premium users) must be assigned the LOCDIMUSER permission set in order to use the app and not interfere with standard Business Central functionality. To setup the app, perform the following:
- Click the Search and enter “Location Dimension Setup”.
- Select the Location Dimension Setup The Location Dimension Setup page will appear.
- Select the Dimension Code that you would like associated to the Location Cards.

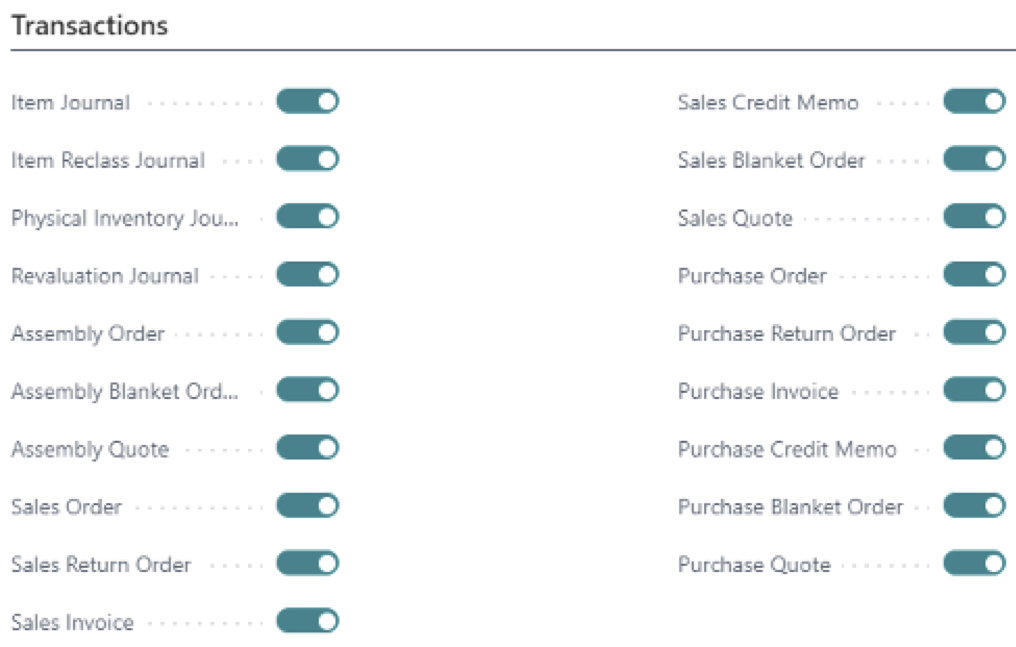
- By default, all transaction types are selected. Deselect any transaction types where you do not want the dimension value to auto populate when entering a Location Code on the transaction. Close the Location Dimension Setup page when complete.
- Open a Location Card where you would like to assign a dimension value. In this example, I opened the EAST location.
- You will notice a new field in the General section of the Location Card named Dimension Value Code. When you click the dropdown list you will see that the list of available dimension values corresponds to the Dimension Code you selected in step 3.
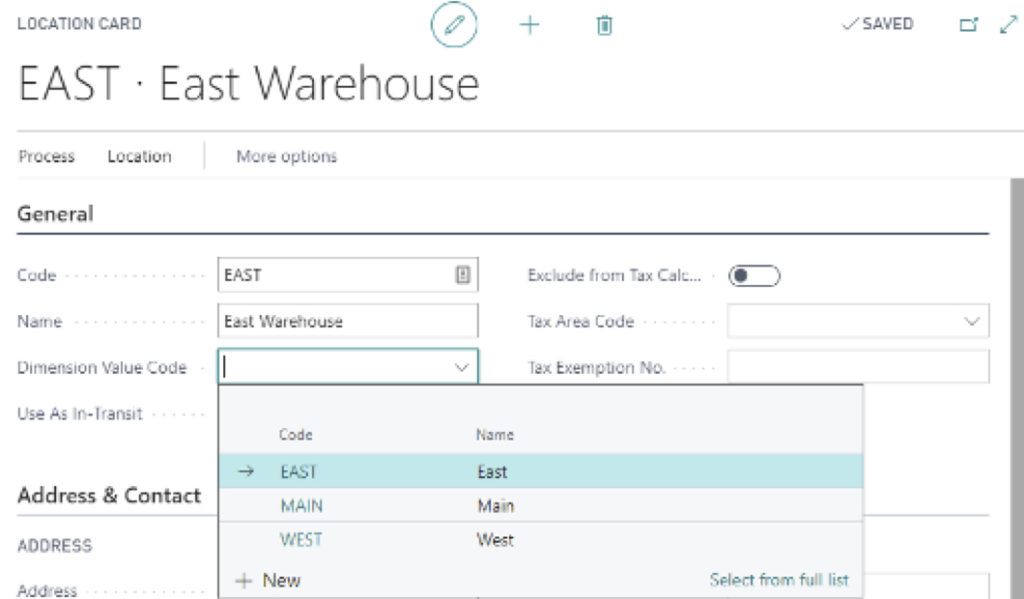
- Select the Dimension Value Code that you would like to assign to the Location Card.
- Perform steps 5-7 for all locations where you desire to assign a dimension value.
Usage Example – Journal
The steps below provide an example of how this app works with a Journal transaction. I will be using the Item Journal to demonstrate.
- Open the Item Journals
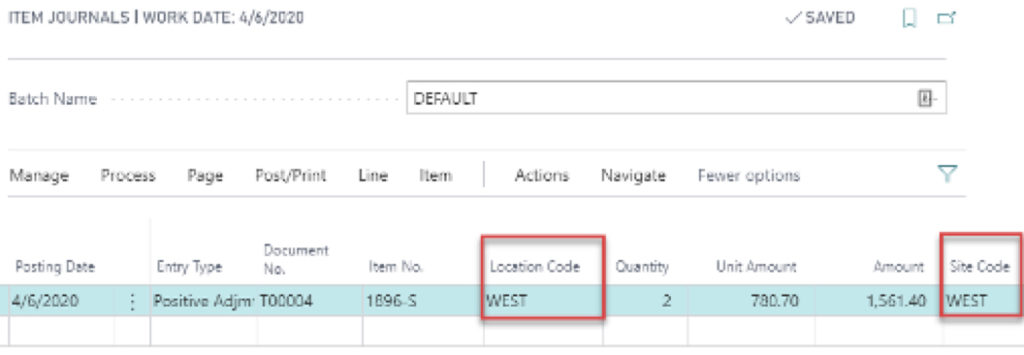
- Enter an Item Journal line. Make sure to select a Location Code as this is what triggers the automatic setting of the dimension value. In the example below, I entered a positive adjustment for item 1896-S at the EAST location. You can see that the Site dimension code was automatically assigned a value of EAST as this is the dimension value assigned to the EAST location.
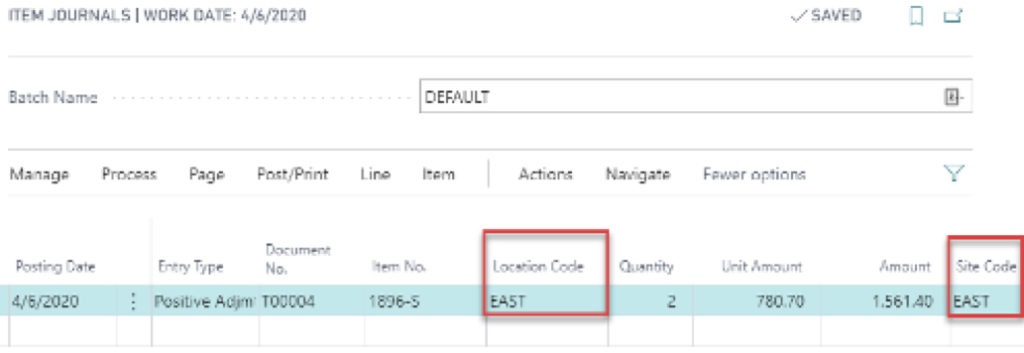
- You can double check this by selecting Line > Dimensions. This will show you the dimension assignments for the selected line. As you can see, a Dimension Value Code of EAST from the SITE dimension has been assigned.

- Now, try changing the Location Code to a different location. You will see that the dimension value updates accordingly.
Usage Example – Document
The steps below provide an example of how this app works with a Document transaction. I will be using the Sales Order document to demonstrate.
- Create a new Sales Order.
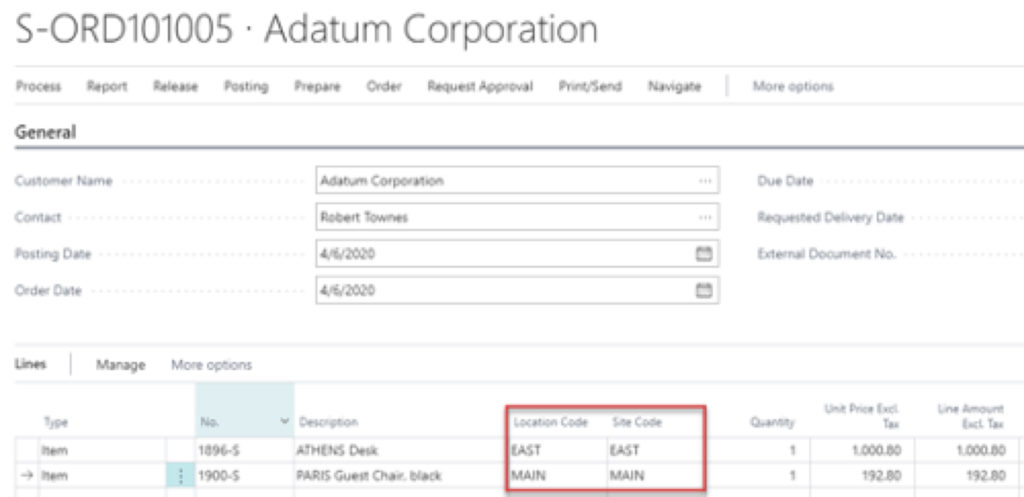
- Enter a line item(s). Make sure to select a Location Code as this is what triggers the automatic setting of the dimension value assigned to the location. In the example below, I entered item 1896-S at the EAST location and item 1900-S at the MAIN location. You can see that the Site dimension codes were automatically entered based on the dimension value assigned to the location.
- Now we are going to take a look at how the app handles the entry of a Location Code at the header of a Document.
- Enter a Location Code in the Shipping and Billing

- Go to the Lines section and enter another line item. The standard behavior of the system will default the Location Code from the header to the line and the app will then set the assigned dimension value.

Usage Example – Assembly Order
Assembly Orders are unique in how they assign Location Codes from the header to the lines after the components of the BOM are automatically added to the lines section. This creates some scenarios where specific rules must be followed in order for the app to assign the dimension values properly. The steps below provide an example of how to properly use this app with Assembly Orders.
- Create a new Assembly Order.
- Enter an Item No. that has an Assembly BOM. In the example below, I entered item 1925-W.
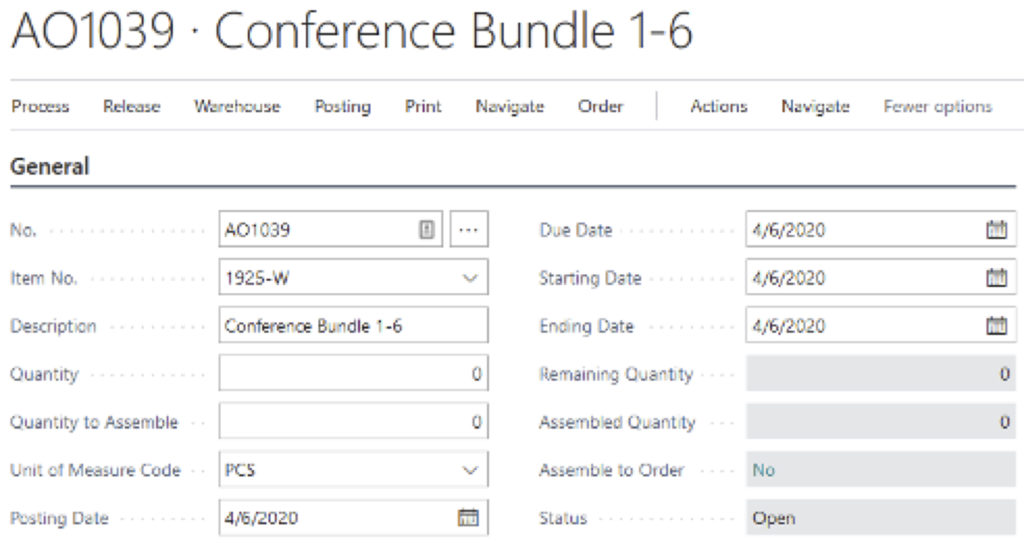
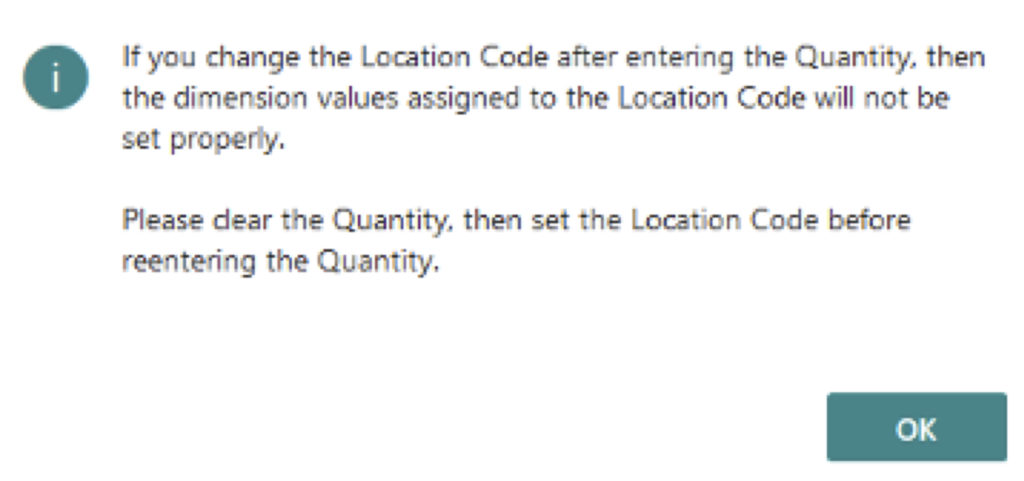
- Before entering a Quantity select a Location Code in the Posting section. This will ensure the Location Code gets automatically assigned to each assembly line as this is what triggers the automatic setting of the dimension value assigned to the location. If you set the Quantity before entering a Location Code, then you will receive a warning message letting you know that the dimension values will not be set properly unless you clear the Quantity and set the Location Code first.
Note: When setting the Location Code, the app will also set the dimension value assigned to the location in the header dimensions. This is needed in order to support this process. For this reason, Resource type lines will also be assigned the dimension value. Please ensure that this is desired behavior before using the app with Assembly Orders.

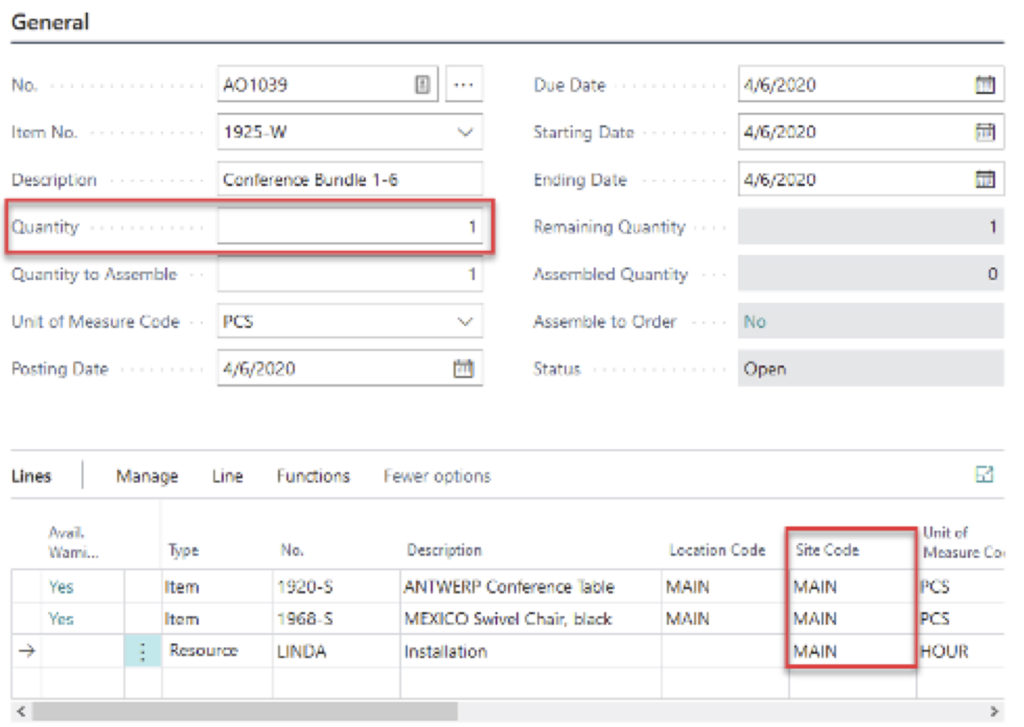
- Enter a Quantity. The assembly lines will be populated. You can see that the Site dimension codes were automatically entered based on the dimension value assigned to the location.
- If you change the Location Code after entering the Quantity, then you will receive a warning message letting you know that you must first clear the Quantity before changing the Location Code. This is needed in order for the app to set the dimension values properly on the lines after a Location Code change in the header.
- If you are using assembly orders in a make to order/blanket order environment where the assembly orders are automatically being created from a sales line, then the same rules defined in this section will apply. They are:
- You must enter the Location Code on the sales line before entering the quantity.
- If you change the Location Code after entering the quantity, then you must first clear the quantity before changing the Location Code.
Supported Transactions
The following defines the supported transactions of the app.
| Transaction | Notes |
| Item Journal | |
| Item Reclass Journal | When performing a transfer, the app will automatically set the dimension value assigned to the Location Code (i.e. from location) and will also set the dimension value assigned to the New Location Code (i.e. to location). This may or may not function as desired. When companies transfer inventory from one location to another, they are in some cases not expecting any GL impact to take place. They are simply moving inventory from one location to another. However, Business Central does create a journal entry. Without dimension codes it usually goes in and out of the same accounts (unless different inventory accounts are setup per location in the Inventory Posting Setup) and no GL impact takes place. However, if different dimensions are assigned on the entries (location A has one dimension and location B has another), then there will be a debit impact to one dimension and a credit impact to another. Some companies will not desire this behavior if reporting expense by location (i.e. dimension), and this may not be warranted if inventory was simply transferred between two locations. If this does not meet your requirements, then the Item Reclass Journal transaction type can be turned off in the Location Dimension Assignment Setup page. |
| Physical Inventory Journal | This app supports the Calculate Inventory function. |
| Item Revaluation Journal | This app supports the Calculate Inventory Value function. |
| Assembly Quote | This app supports the automatic creation of Assembly Quotes from Sales Quotes. See Usage Example – Assembly Order section for rules that apply. |
| Assembly Blanket Order | This app supports the automatic creation of Assembly Blanket Orders from Sales Blanket Orders. See Usage Example – Assembly Order section for rules that apply. |
| Assembly Order | See Usage Example – Assembly Order section for rules that apply. |
| Sales Order | |
| Sales Return Order | |
| Sales Invoice | |
| Sales Credit Memo | |
| Sales Blanket Order | |
| Sales Quote | |
| Purchase Order | |
| Purchase Return Order | |
| Purchase Invoice | |
| Purchase Credit Memo | |
| Purchase Blanket Order | |
| Purchase Quote |
FAQs
- What happens if I change the Dimension Code in the Location Dimension Setup page?
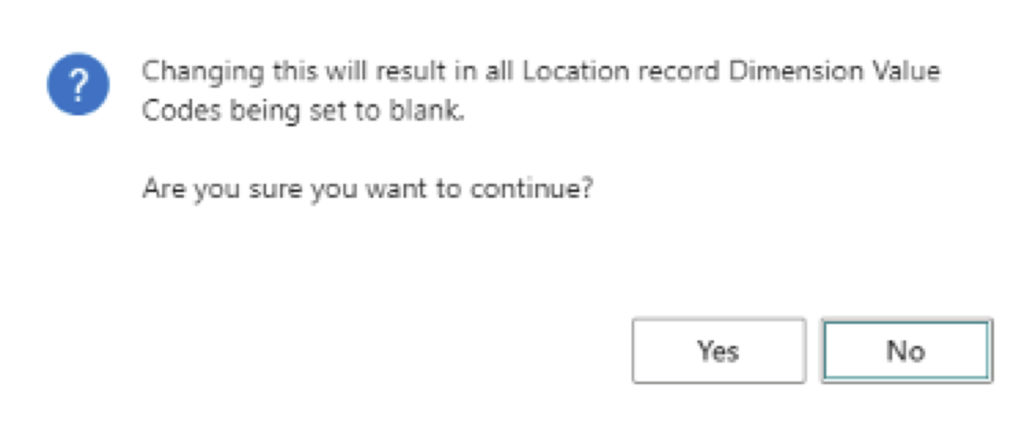
If you change the Dimension Code in the Location Dimension Setup page, then a warning message will appear stating that “Changing this will result in all Location record Dimension Value Codes being set to blank. Are you sure you want to continue?”. If you click “Yes”, then the Dimension Value Code set on each Location Card will be set to blank resulting in the app no longer having any function. If you click “No”, then no changes will occur.
If you decide to use a different Dimension Code and assign this in the Location Dimension Setup page, you will still receiving the same warning message and you can click “Yes”, then you can proceed with following the steps in the Location Dimension Assignment Setup section in order to assign the dimension values to the Location Cards.
- What happens if I change the Global Dimension or Shortcut Dimension in the General Ledger Setup page that is assigned to the Location Dimension Setup page?
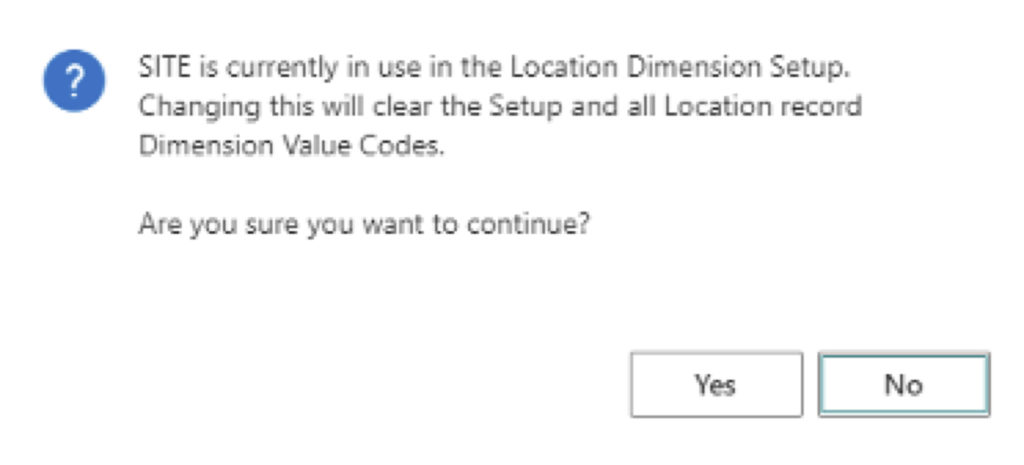
If you change the Global Dimension or Shortcut Dimension in the General Ledger Setup page that is assigned to the Location Dimension Setup page, such as setting it to blank or moving it to another Shortcut Dimension position, then a warning message will appear stating “<Dimension> is currently in use in the Location Dimension Setup. Changing this will clear the Setup and all Location record Dimension Value Codes. Are you sure you want to continue?” If you click “Yes”, then the Dimension Code set in the Location Dimension Setup page and the Dimension Value Code set on each Location Card will be set to blank resulting in the app no longer having any function. If you click “No”, then no changes will occur.
- Does the app support the Manufacturing business area?
While the app does support Assembly Orders it does not support the Manufacturing business area. This is in consideration, but as of the moment it is not supported.
- Does the app support the Warehouse business area?
While the app does not execute any code on any Warehouse tables, many Warehouse documents inherit their dimension values from preceding documents such as Sales Orders and Purchase Orders. The app does support these documents, and therefore, the Warehouse documents that have one of these preceding documents will inherit the dimension values from the transaction types that the app supports.
- Why doesn’t the app support Transfer Orders?
Transfer Orders do not use the same process as an Item Reclass Journal where a Dimension Code and New Dimension Code can be stored when a Location Code and New Location Code are selected. The Transfer Order only gives the option for one Dimension Code, and therefore, does not support inserting a dimension value by location.
- Does the app only support line item types of Item?
On Sales and Purchase documents the app supports all line item types including G/L Account, Resource, Fixed Asset, and Charge Item. On Assembly documents the app supports both line item types of Item and Resource.